Google Analytics कैसे सेट करें
Google Analytics का उपयोग वेब ट्रैफ़िक को देखने और समझने के लिए किया जाता है।
यह मुफ़्त और उपयोग में आसान है।
आप इसे कई उपयोग के मामलों के लिए अनुकूलित कर सकते हैं।
यह लीक से हटकर काम करता है।
इसे स्थापित करना तेज़ है। आज ही अपनी अंतर्दृष्टि प्राप्त करें!
मेरी मुफ्त वेबसाइट बनाएंGoogle Analytics के बारे में पढ़ना छोड़ें। मुझे सीधे पहले कदम पर ले चलो। पहले चरण पर जाएँ
गूगल एनालिटिक्स क्या है
Google Analytics एक वेब विश्लेषिकी समाधान है।
यह Google द्वारा विकसित और समर्थित है।
नवीनतम संस्करण को Google Analytics 4 कहा जाता है।
इसका उपयोग ऑडियंस, पृष्ठ दृश्य, सत्र और, जनसांख्यिकी और ईवेंट जैसे डेटा देखने के लिए किया जा सकता है।
Google Analytics क्यों सक्षम करें
बेहतर निर्णय लेने के लिए अपने वेब ट्रैफ़िक को समझें।
बिक्री फ़नल को समझें और सुधारें।
प्रयोग से सीखें (उदाहरण के लिए, a/b परीक्षण)।
Google के पास Google ऑप्टिमाइज़ नामक एक और समाधान है। यह समाधान परीक्षण के लिए बनाया गया है।
Google Analytics किसके लिए है
Google Analytics उन लोगों के लिए उपयोगी है जिनके पास वेबसाइट है।
यह आपको इस बारे में जानकारी देता है कि आपकी साइट का उपयोग कौन करता है और वे इसके साथ कैसे इंटरैक्ट करते हैं।
इसके अलावा, इंटरफ़ेस को समझना आसान है।
सेवा का उपयोग करने और नेविगेट करने के लिए आपको एक विश्लेषिकी पृष्ठभूमि की आवश्यकता नहीं है।
Google Analytics को चरण-दर-चरण कैसे सेट करें
Google Analytics को दो तरह से सेट किया जा सकता है ग्लोबल वेबसाइट टैग (gtag.js) या Google टैग मैनेजर ।
द ग्लोबल वेबसाइट टैग का उपयोग करने का सबसे आसान तरीका है।
यह ट्यूटोरियल द ग्लोबल वेबसाइट टैग अप्रोच का उपयोग करेगा।
तैयारी
तय करें कि किस कोड संपादक का उपयोग करना है और अपना परिवेश सेट करना है।
W3Schools ने W3Schools Spaces नामक एक उपयोग में आसान कोड संपादक बनाया है । साइन अप करें और कुछ ही क्लिक में आरंभ करें।
मुफ्त में शुरू करेंअपनी index.html फ़ाइल बनाएं ताकि आप कोड दर्ज करने के लिए तैयार हों।
सभी सेटअप। चल दर!
Google Analytics सेट करें: वैश्विक वेबसाइट टैग
चरण 1: एक Google Analytics खाता बनाएं
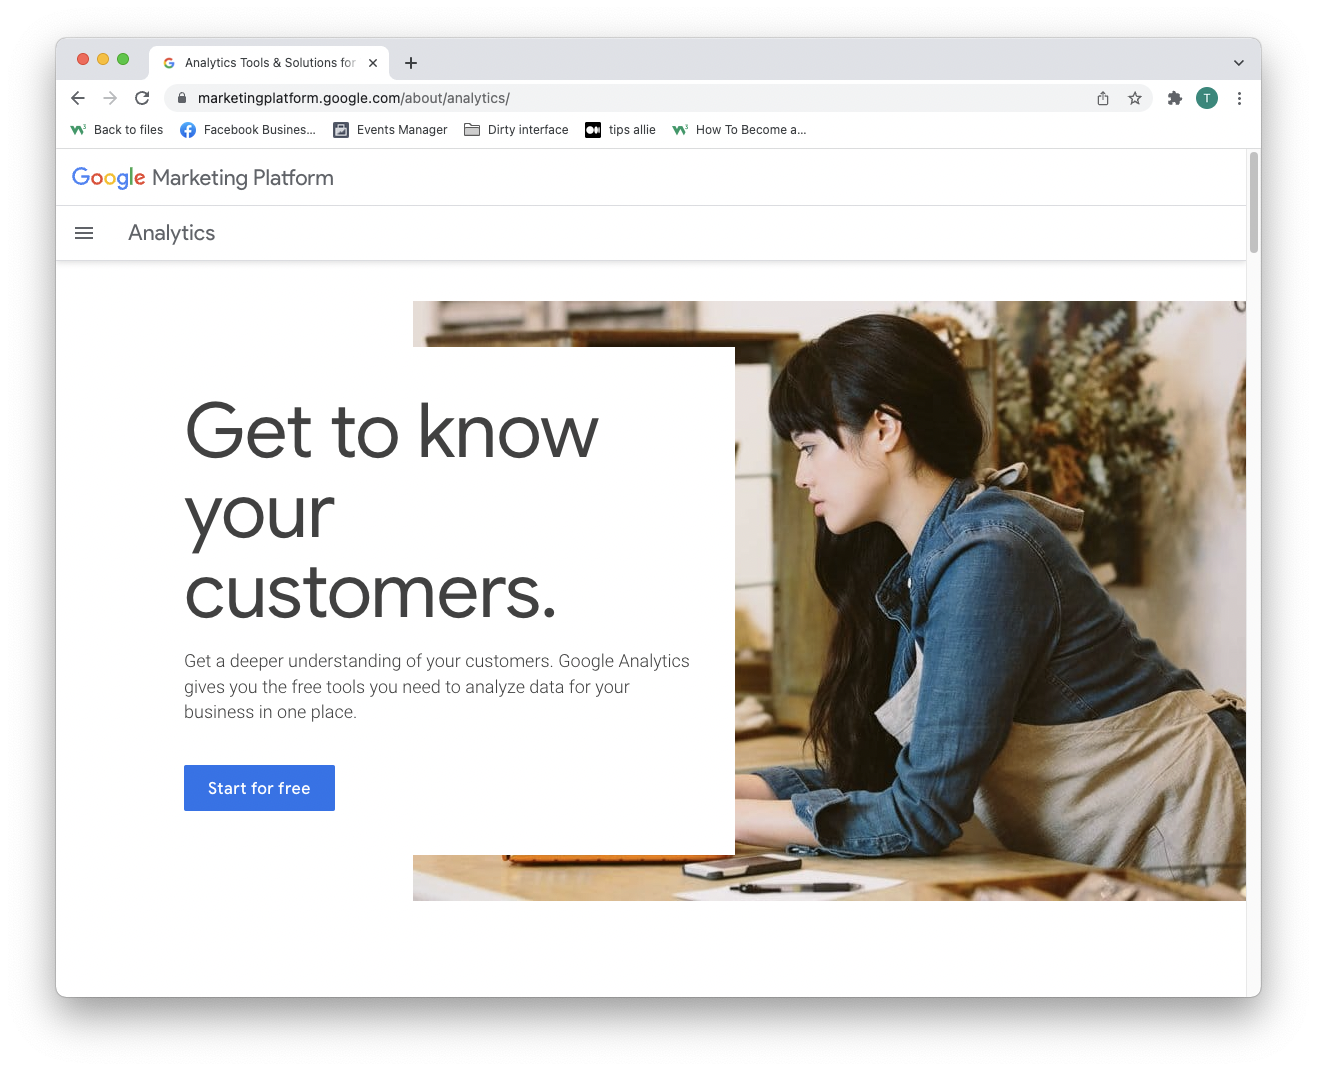
Analytics पर जाएं: एक खाता बनाएं या Analytics में साइन इन करें
ऊपर दिए गए पैराग्राफ में लिंक आपको Google Analytics लैंडिंग पृष्ठ पर ले जाता है।
"मुफ्त में शुरू करें" बटन पर क्लिक करें।
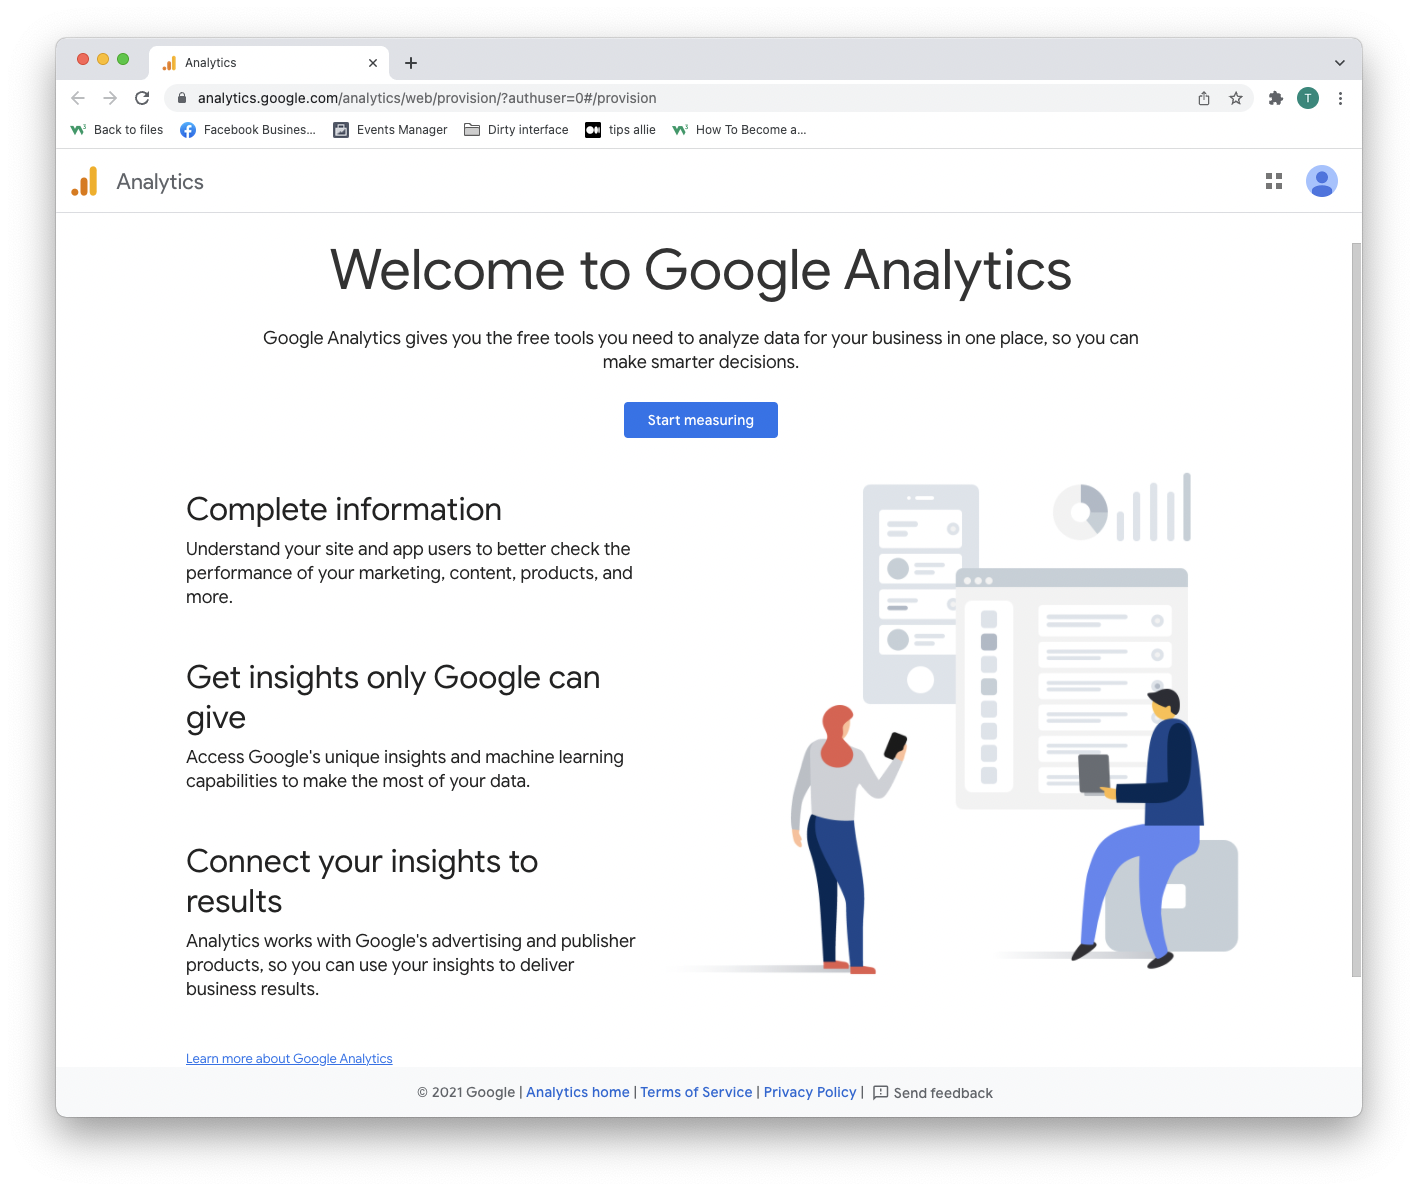
चरण 2: स्वागत पृष्ठ दर्ज करें
खाता बनाने या साइन इन करने के बाद, समाधान के लिए आपका स्वागत है।
आगे बढ़ने के लिए "मापना शुरू करें" बटन दबाएं।
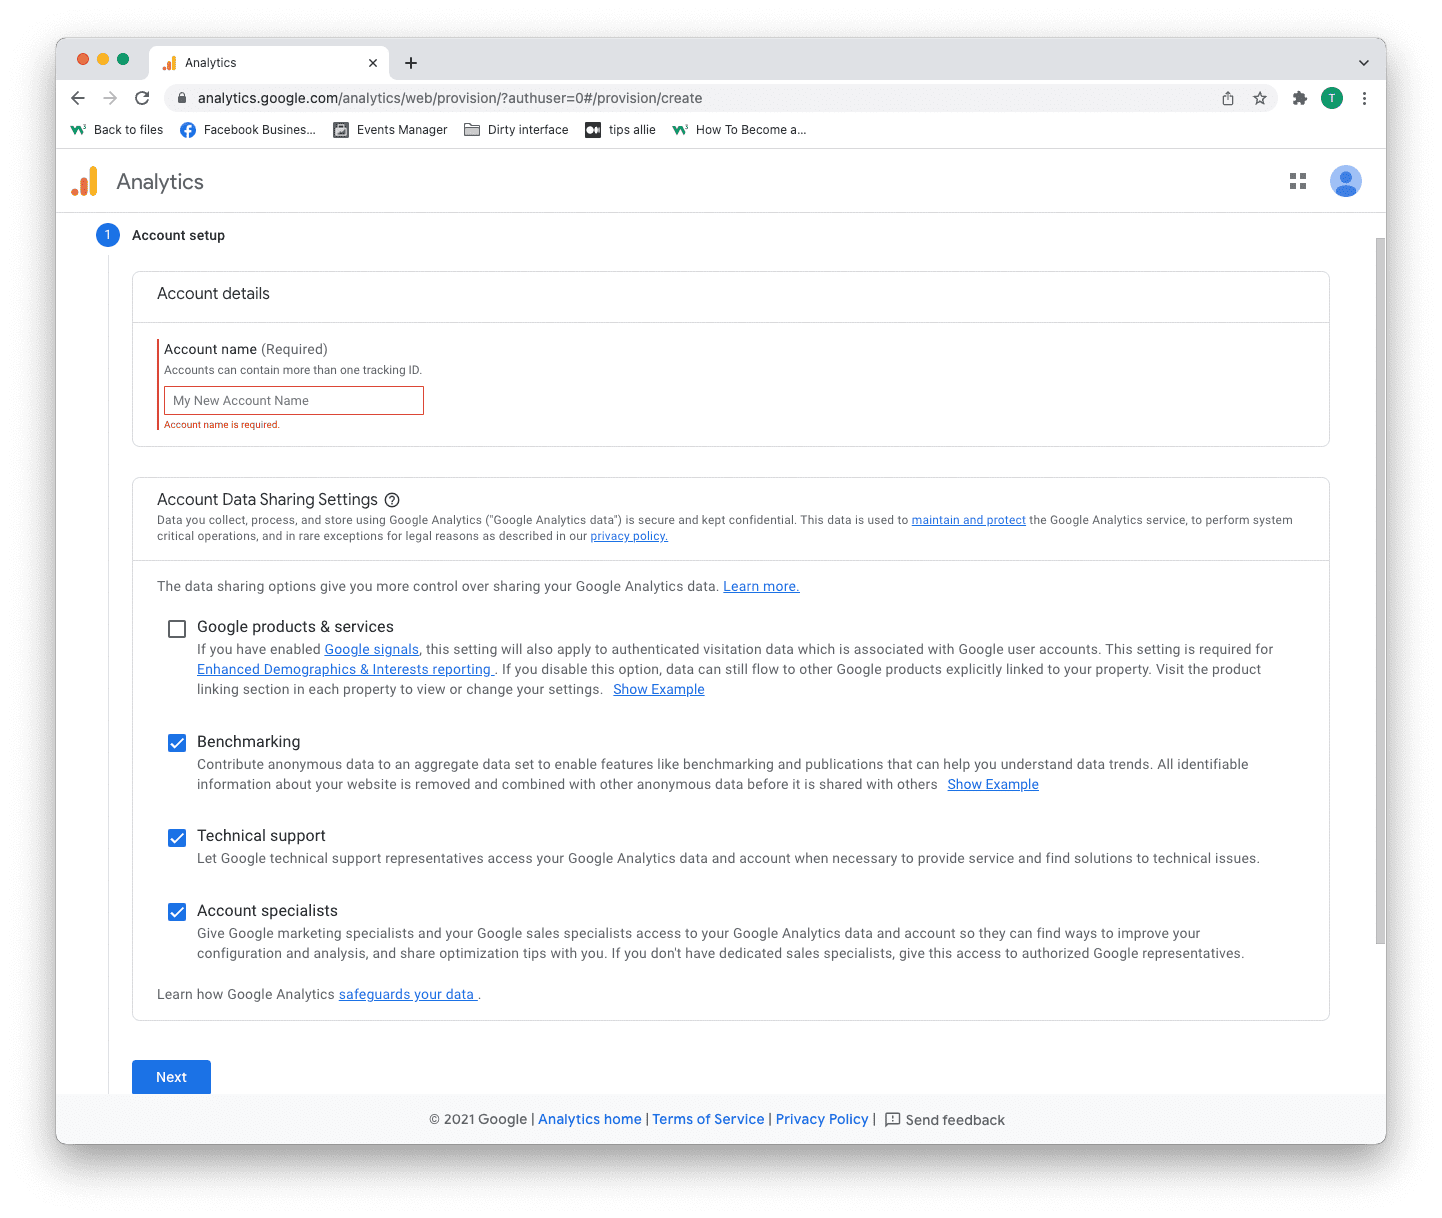
चरण 3: खाता सेटअप
आपको यहां दो निर्णय लेने हैं।
- अपना खाता नाम दर्ज करें।
- तय करें कि आप कौन सा डेटा साझा करना चाहते हैं।
- "अगला" बटन पर क्लिक करें।
एक खाते में एक से अधिक ट्रैकिंग आईडी हो सकती हैं। आप एक खाते से एक से अधिक वेबसाइट ट्रैक कर सकते हैं।
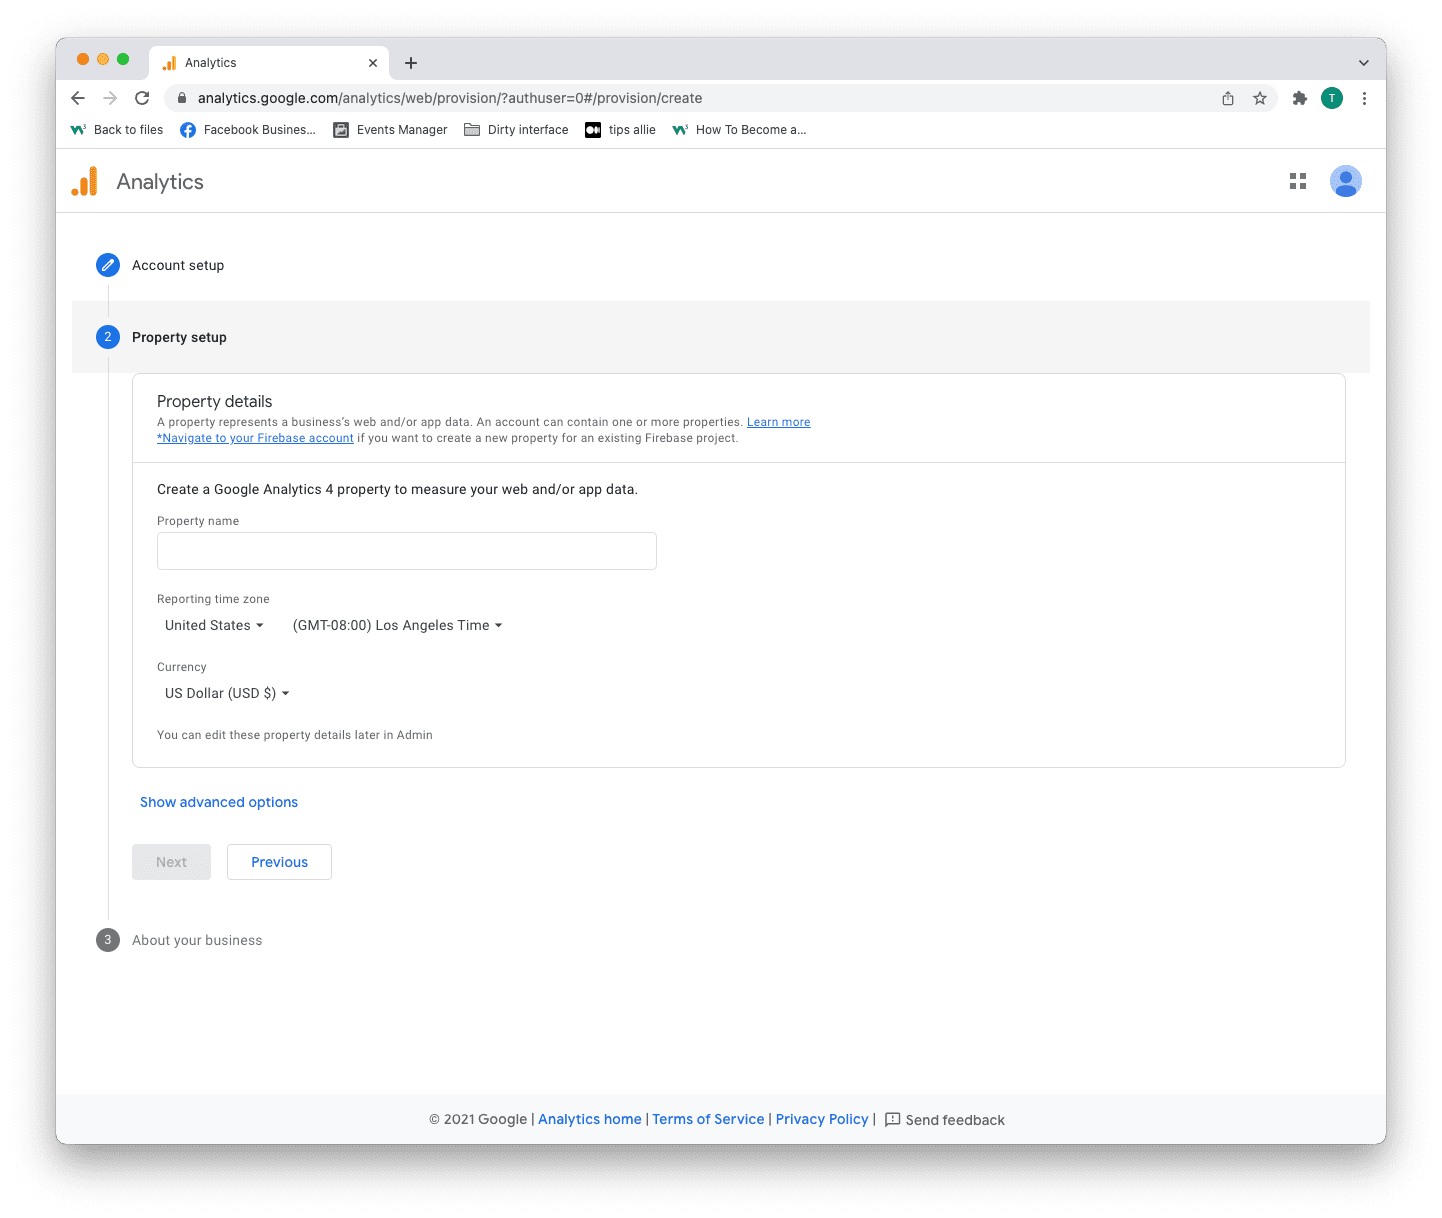
चरण 4: संपत्ति सेटअप
संपत्ति वह सेवा है जिसे आप मापते हैं, जैसे वेबसाइट, एप्लिकेशन, लिंक ट्री इत्यादि।
- एक संपत्ति का नाम दर्ज करें।
- अपना समय क्षेत्र दर्ज करें।
- आपके द्वारा उपयोग की जाने वाली मुद्रा दर्ज करें।
- "अगला" बटन पर क्लिक करें।
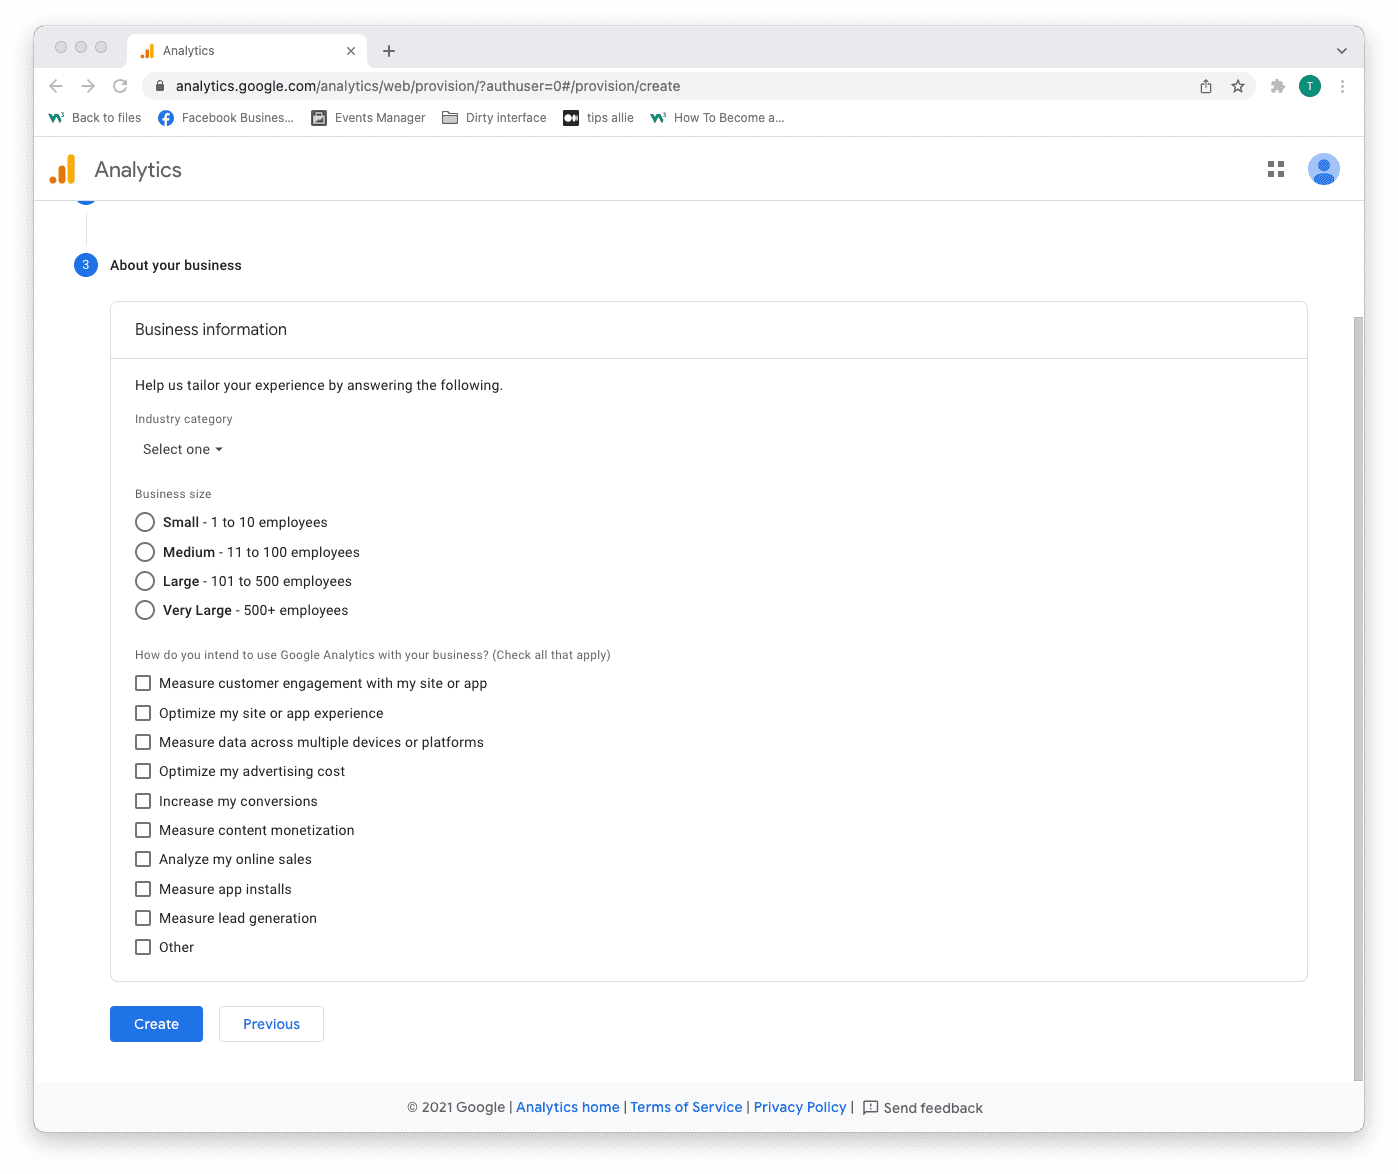
चरण 5: व्यावसायिक जानकारी जोड़ें
Analytics आपके अनुभव को अनुकूलित करने के लिए जानकारी का उपयोग करता है।
- अपनी उद्योग श्रेणी चुनें।
- व्यवसाय का आकार चुनें।
- Tick the boxes for how you are planning to use Analytics.
- Click the "Create" button to proceed.
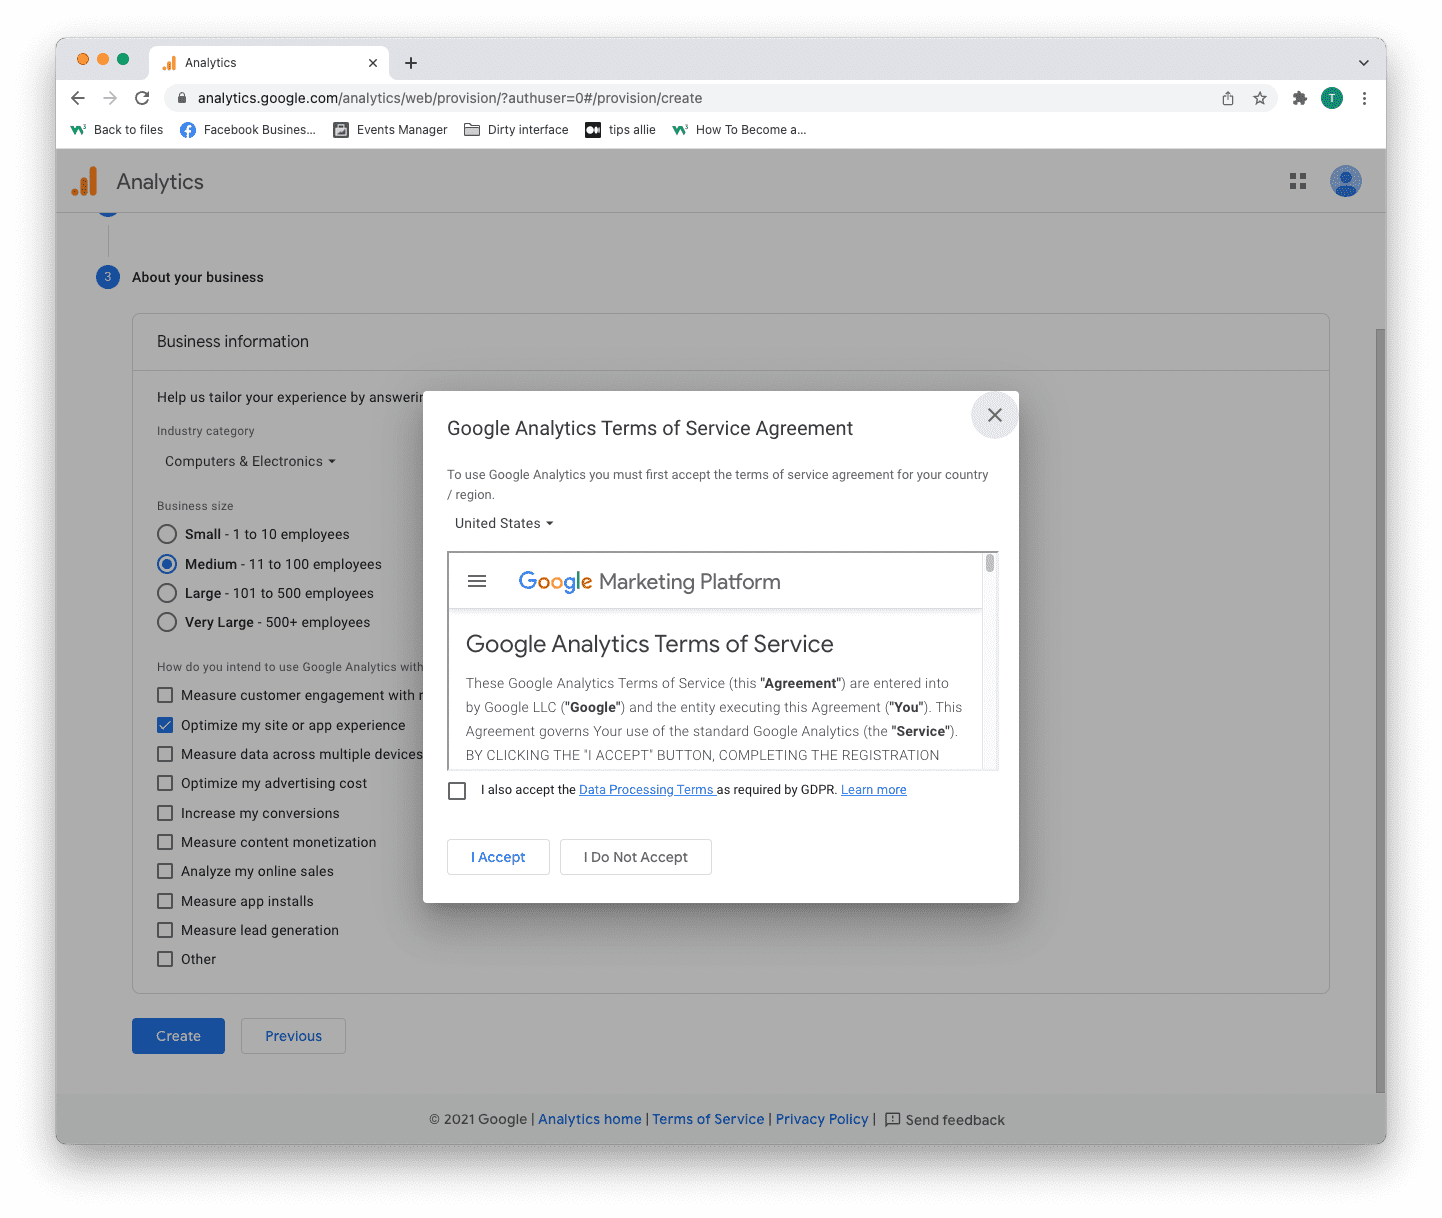
Step 6: Terms of Service Agreement
Read and understand the terms of service.
Tick the GDPR box and click the "I accept" button if you agree.
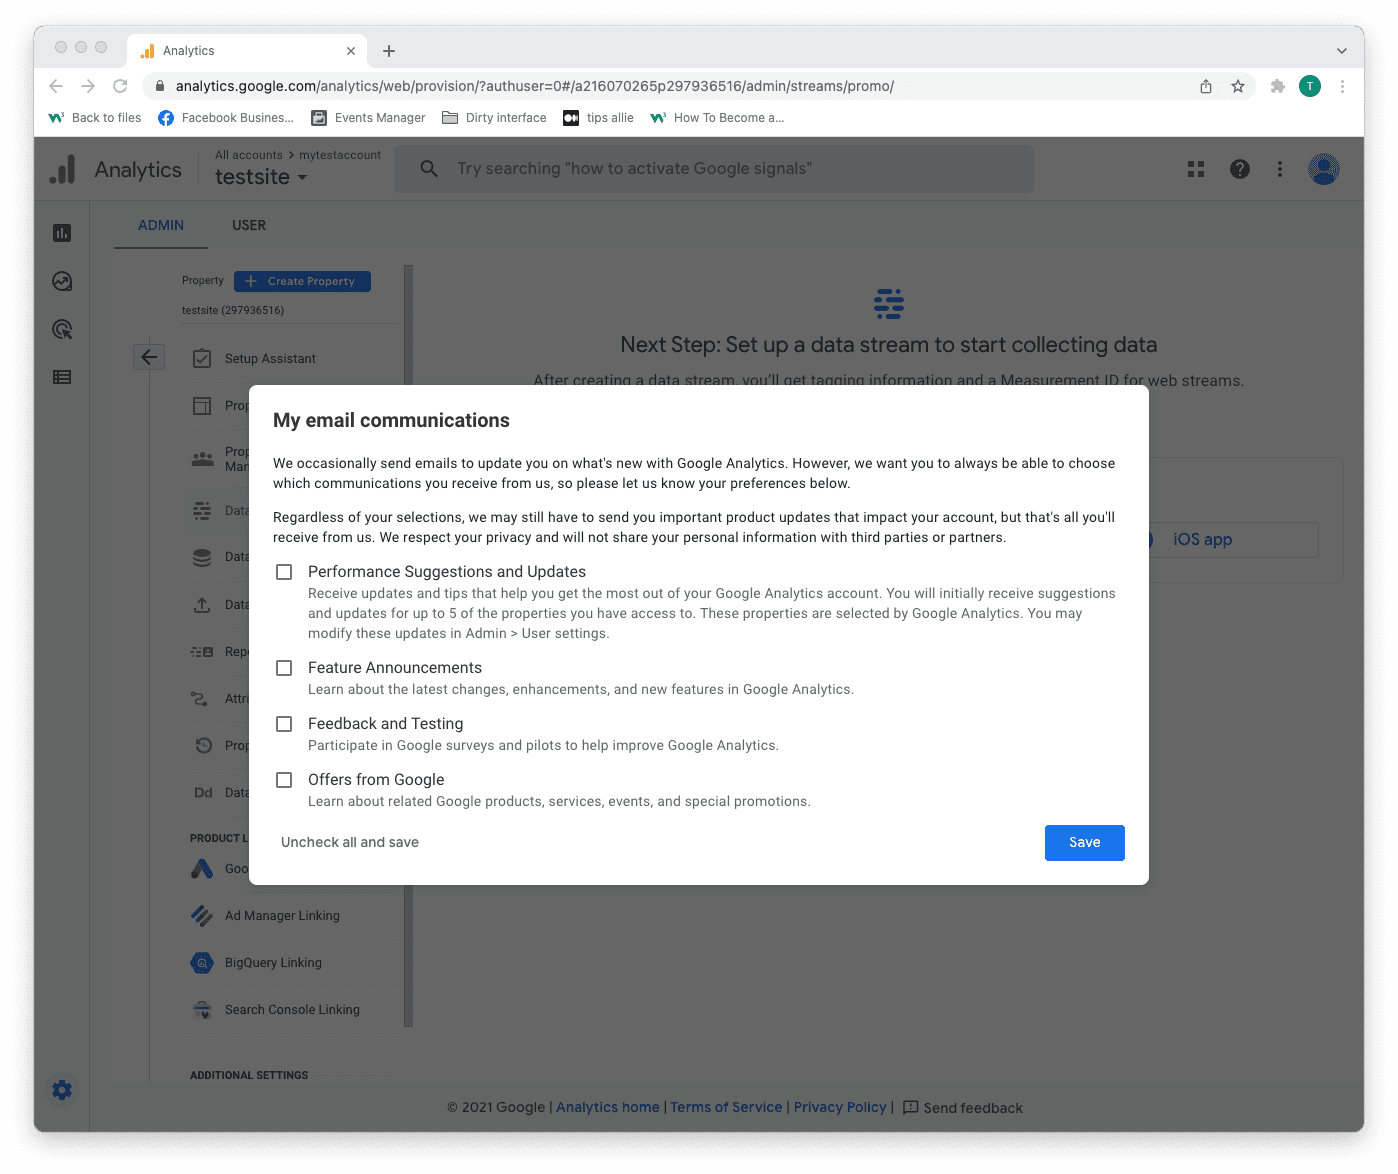
Step 7: Email subscriptions
- Tick or uncheck all boxes.
- Click the "Save" button to continue.
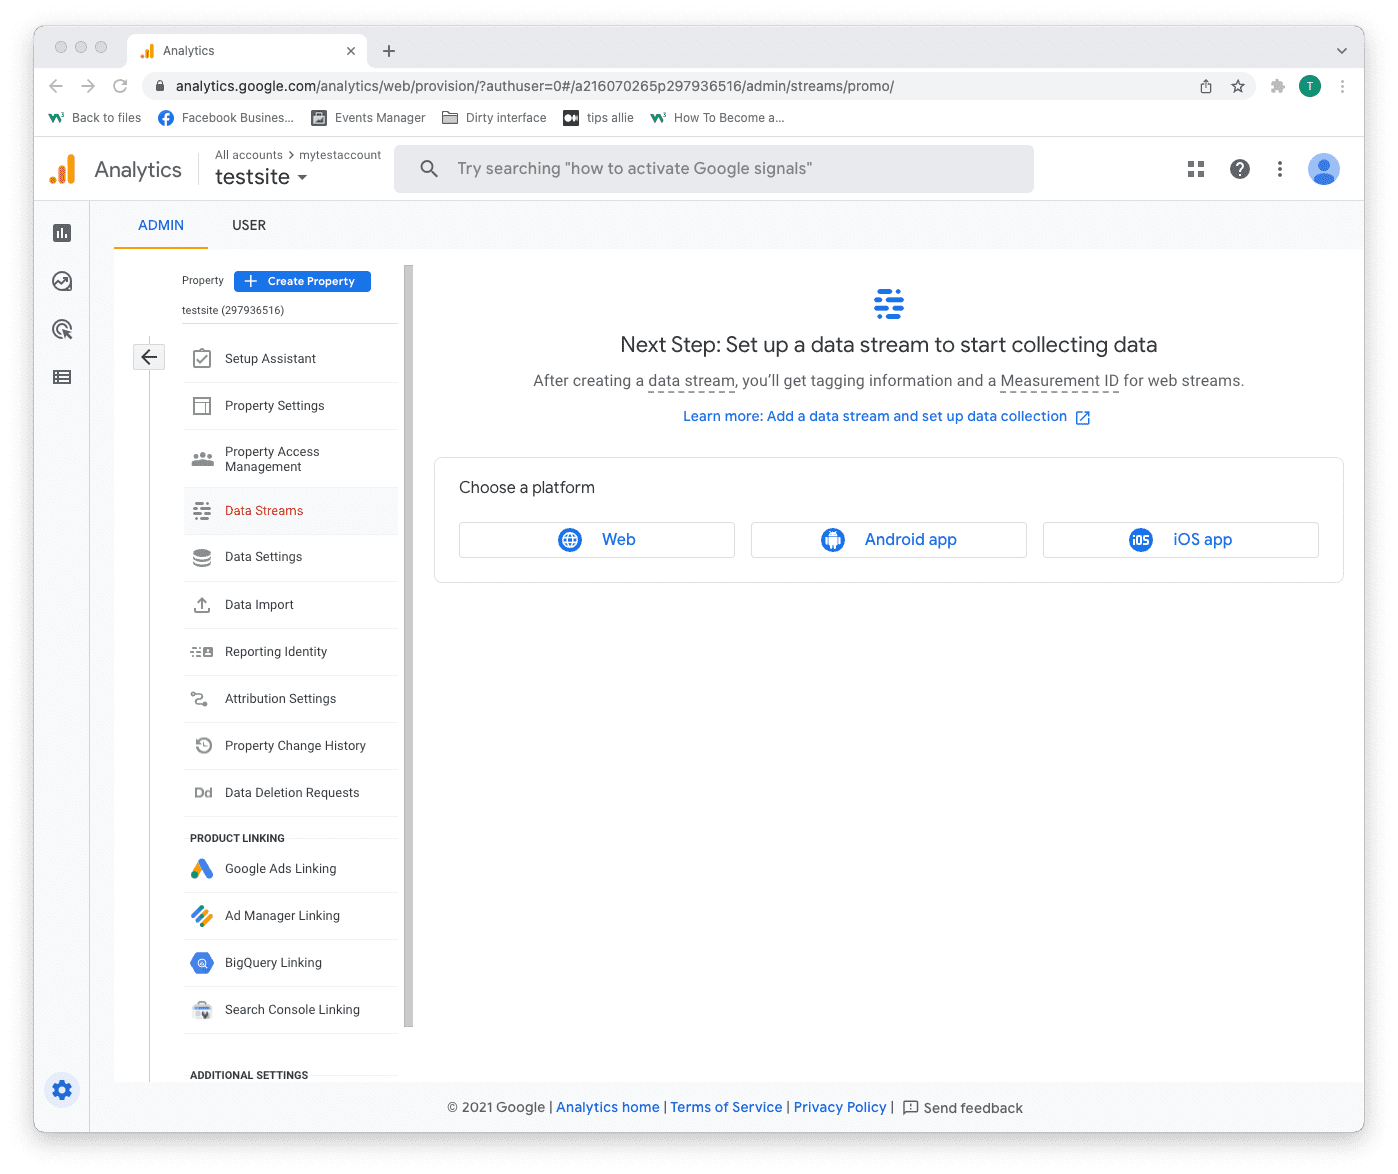
Step 8: Select platform
Chose the platform where you are collecting data.
Then, click the relevant platform to continue.
We are continuing with "Web" as the example in this tutorial.
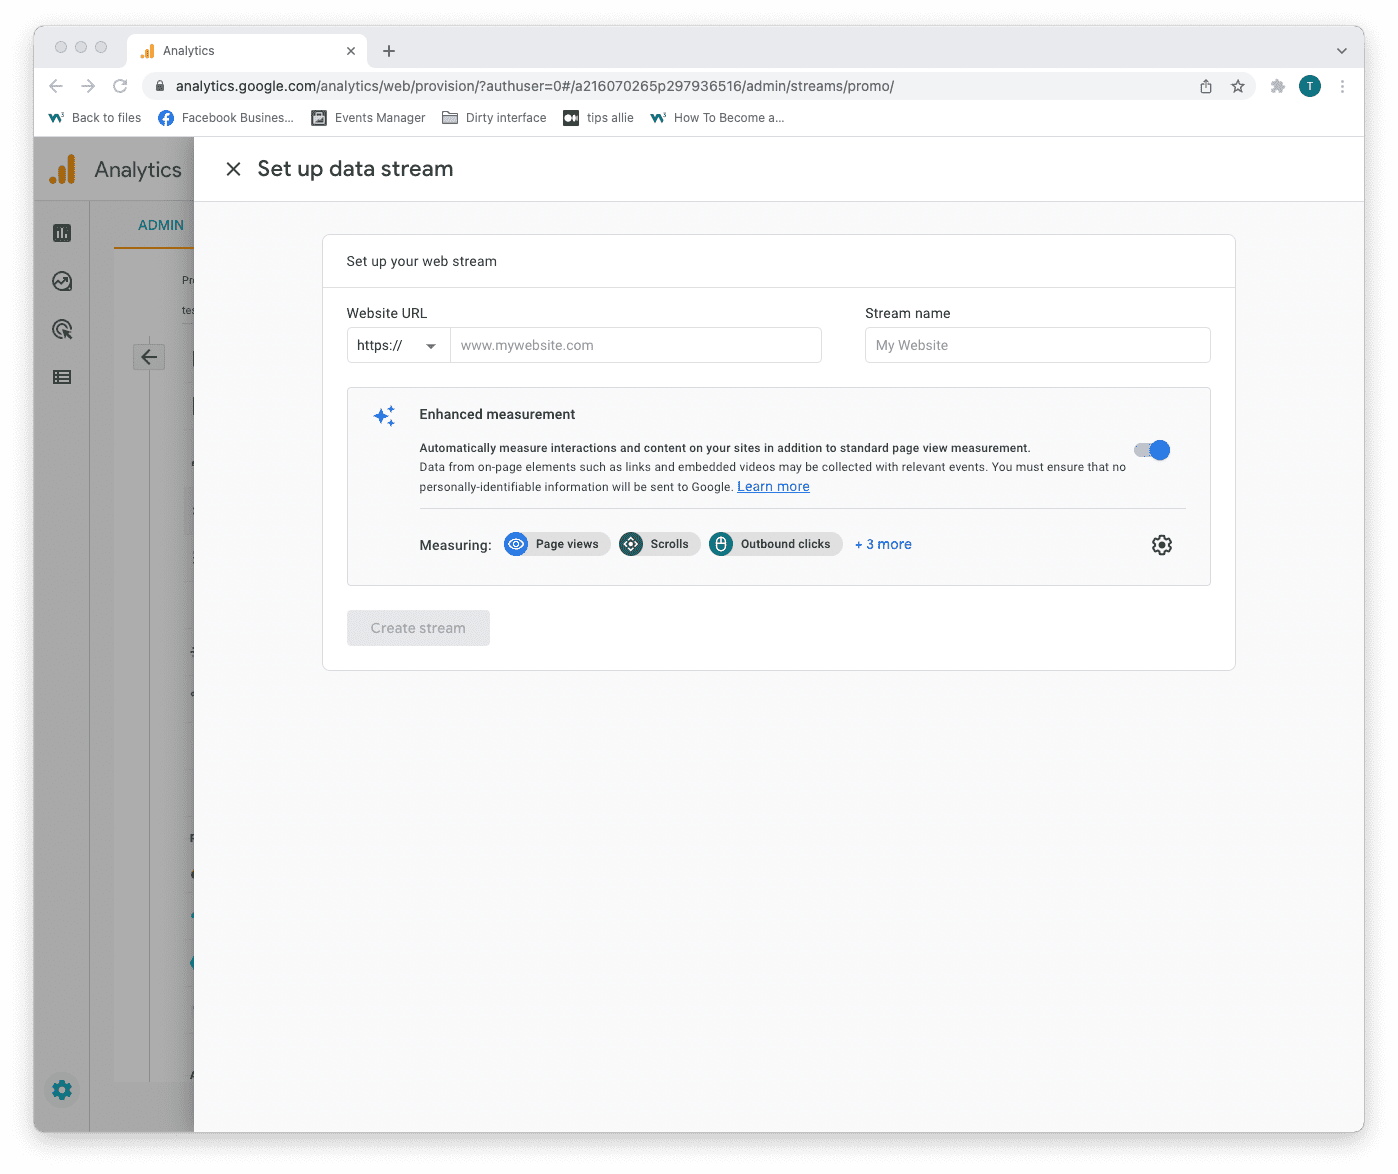
Step 9: Data stream setup
Enter data stream details.
- The URL to your site.
- The name that you want to give the stream.
- Decide if you are to enable enhanced measurement or not.
- Click on the "Create stream" button to continue.
The enhanced measurement can give the data more context. Improving your understanding of the traffic.
Step 10: Web stream overview
Here you can see a detailed overview of the web stream.
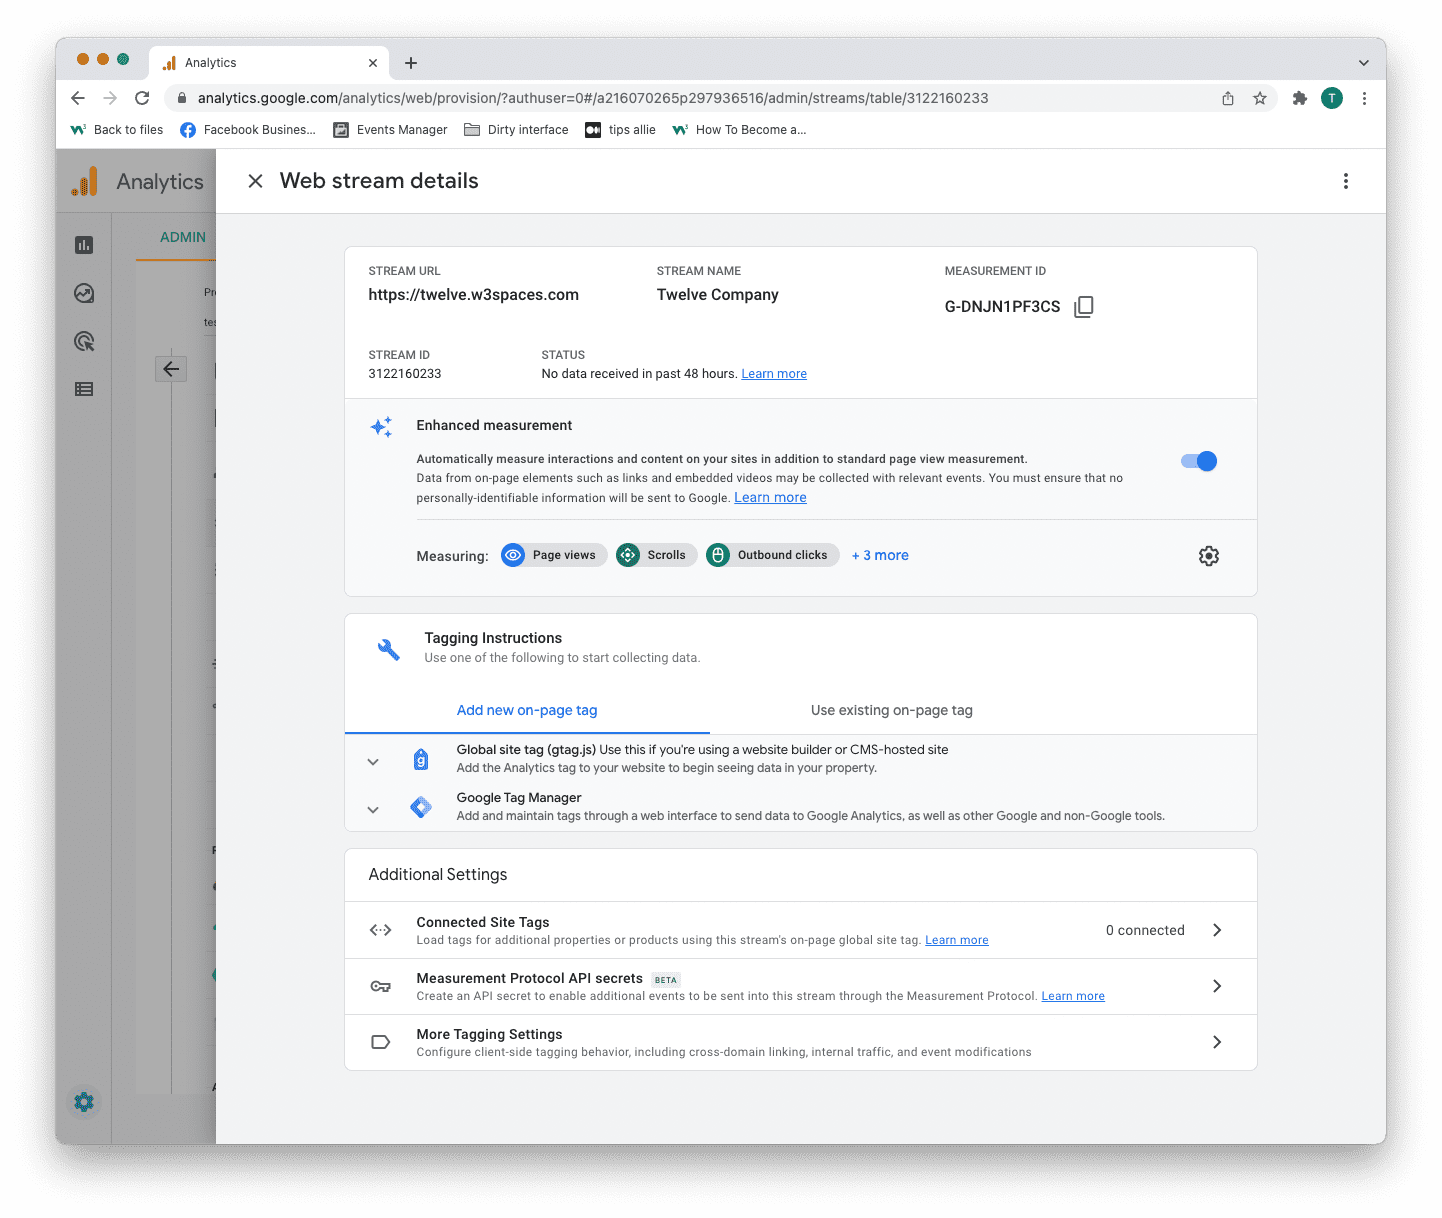
Here are the key takeaways from the overview.
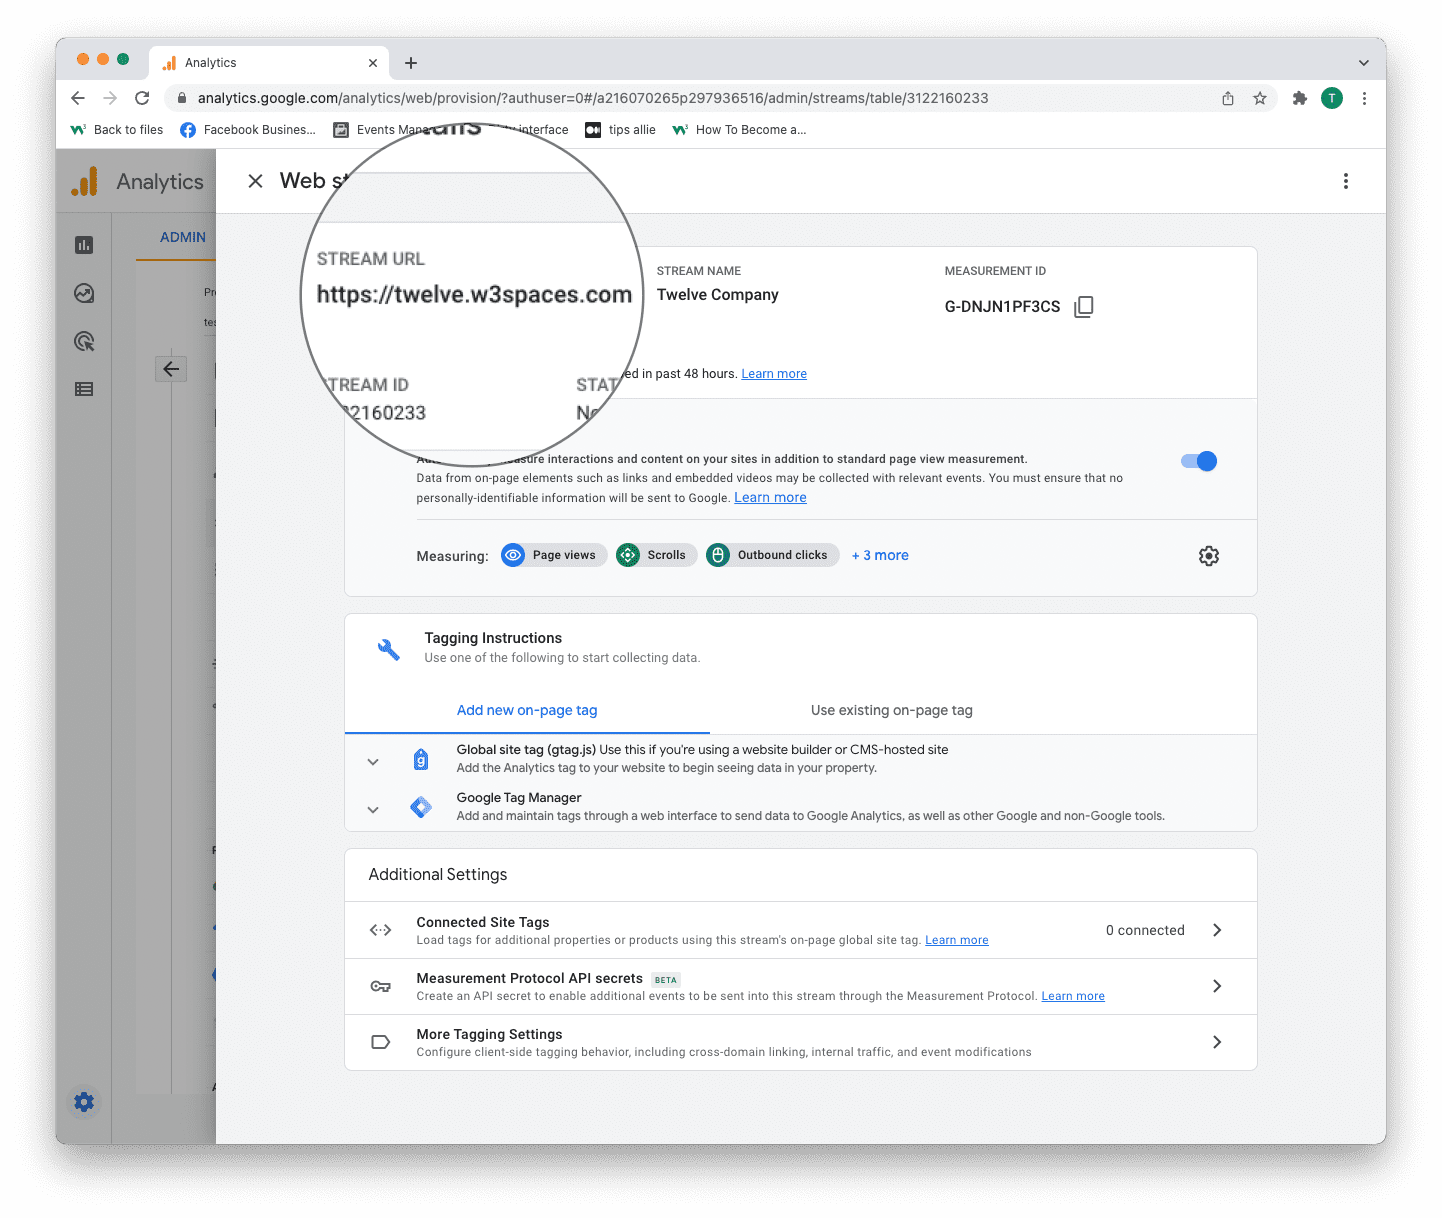
1. Stream URL.
The Stream URL is the link to the connected site.
2. Measurement ID
The Measurement ID is the identifier for your data stream.
It has a format of G-XXXXXXX.
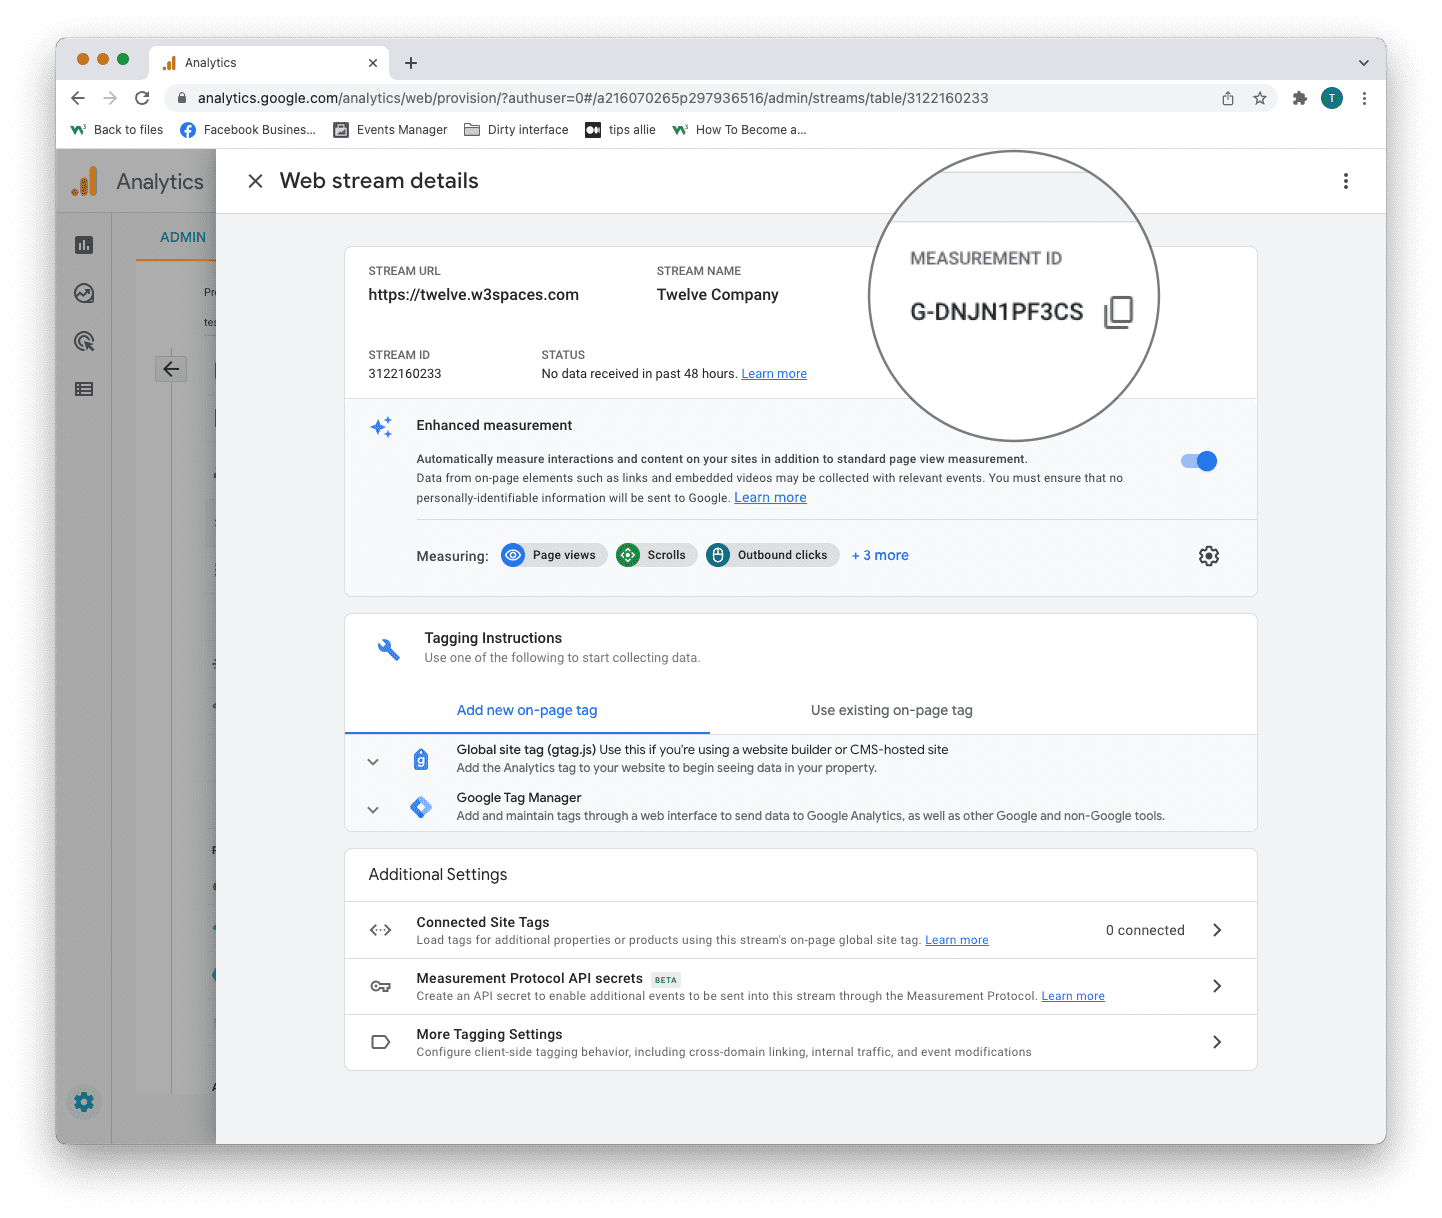
Google Analytics 4 uses Measurement ID. Older versions use Tracking ID. You can not have both.
3. Tagging instructions
Decide to use Global site tag (gtag.js) or Tag manager.
This tutorial will use the Global site tag.
Installing the Global site tag is the easiest and quickest way of getting it up and running.
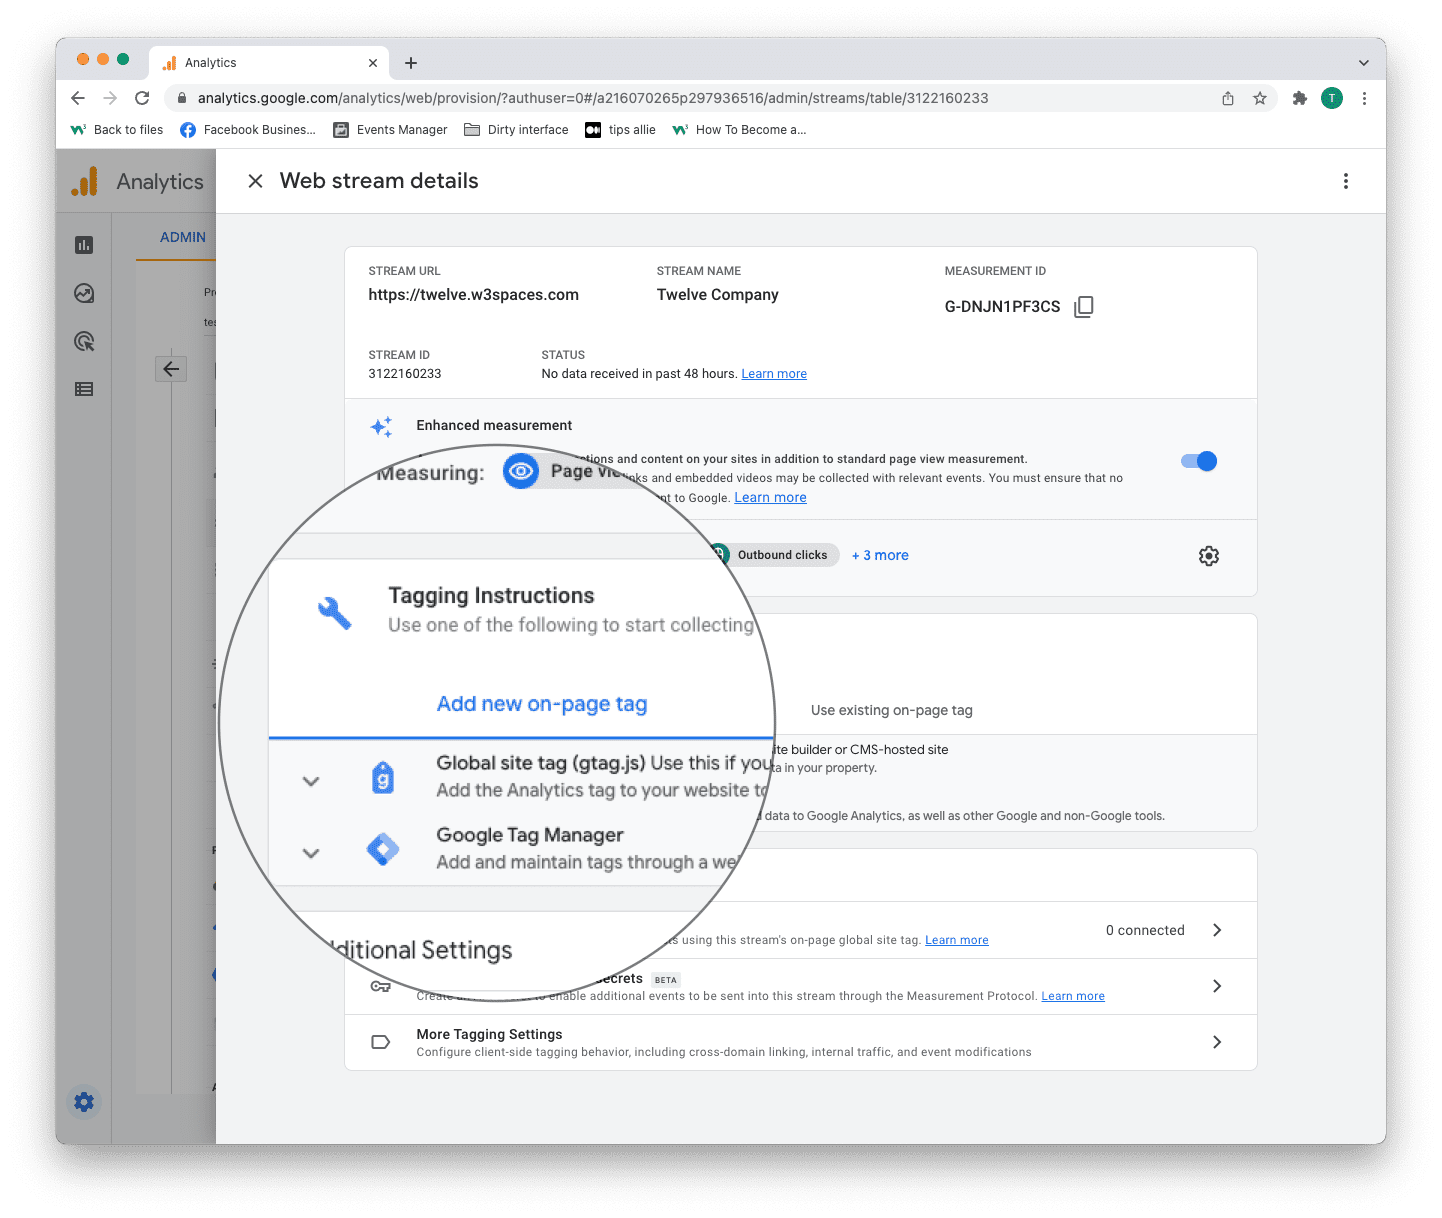
Step 11: Global site tag (gtag.js)
Click the "Global site tag (gtag.js)" row.
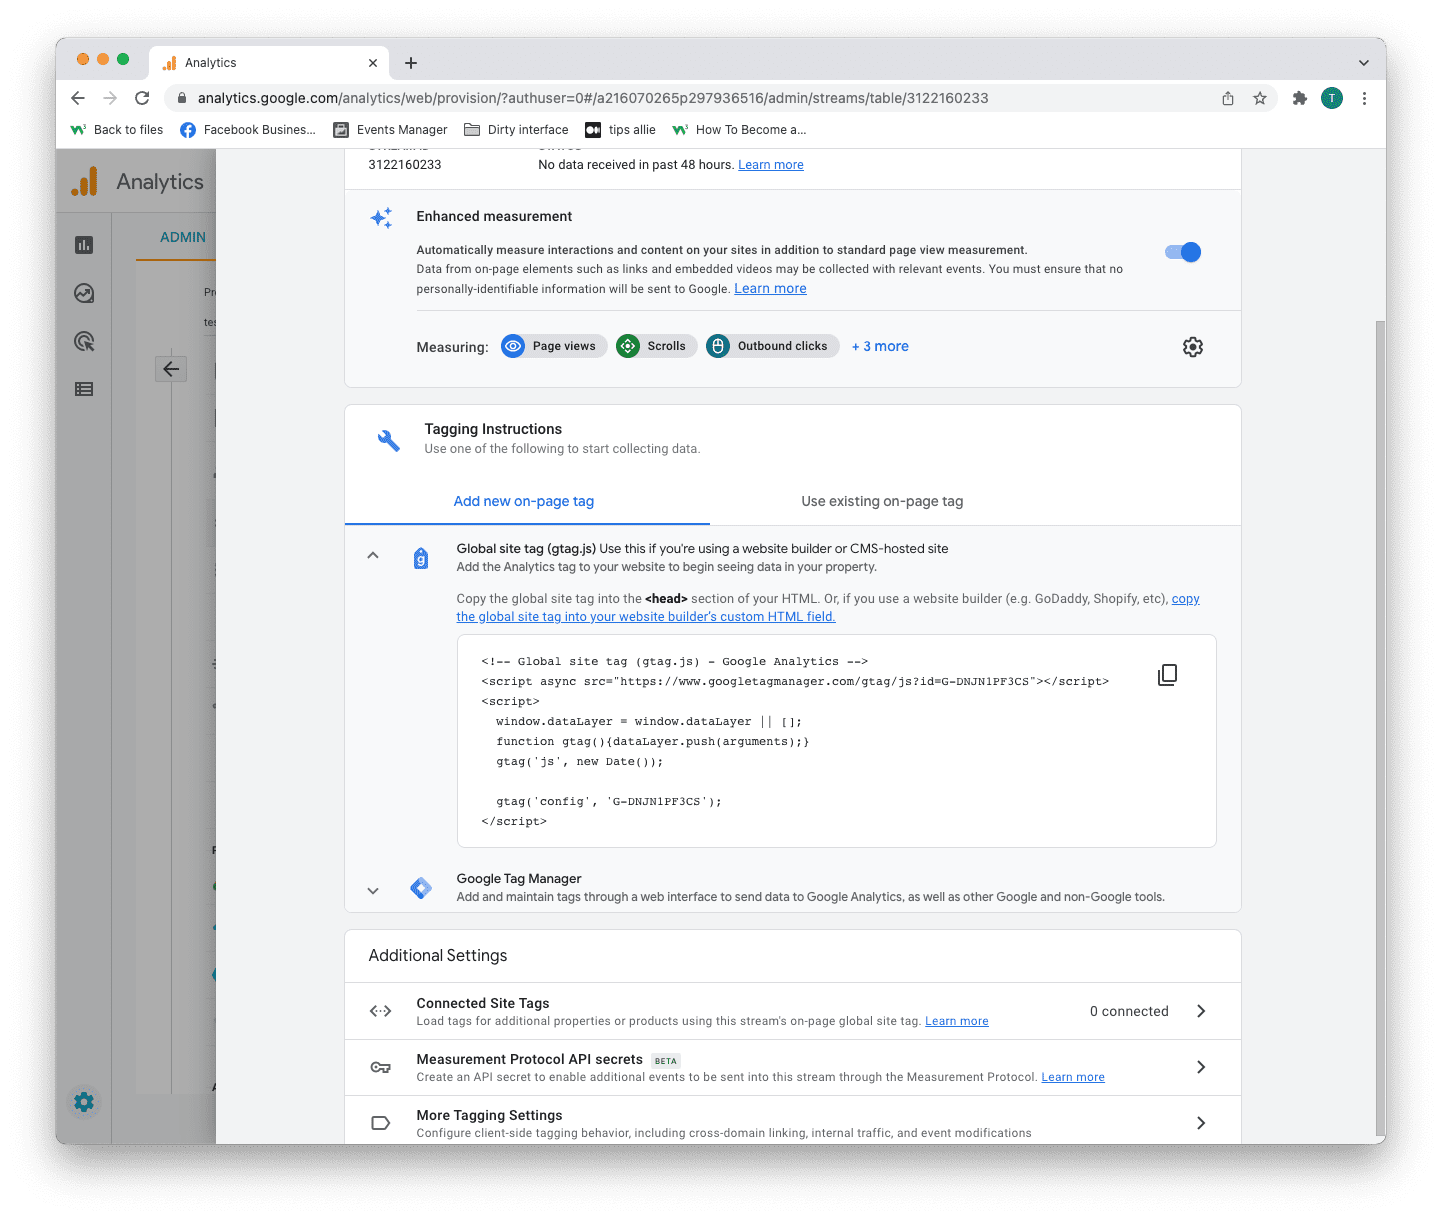
Here you can see a code snippet.
The code snippet is a script to allow Google to measure data on your site.
You can see the Measurement ID in the second last line in the code snippet.
The code snippet
<!-- Global site tag (gtag.js) - Google Analytics -->
<script async src="https://www.googletagmanager.com/gtag/js?id=G-DNJN1PF3CS"></script>
<script>
window.dataLayer = window.dataLayer || [];
function gtag(){dataLayer.push(arguments);}
gtag('js', new Date());
gtag('config', 'G-XXXXXXX');
</script>
Step 12: Enter the code snippet
Copy the code snippet.
Make sure to include your Measurement ID.
Locate the <head> tag in your HTML.
Paste the code snippet just below the <head> tag.
Save and publish the code.
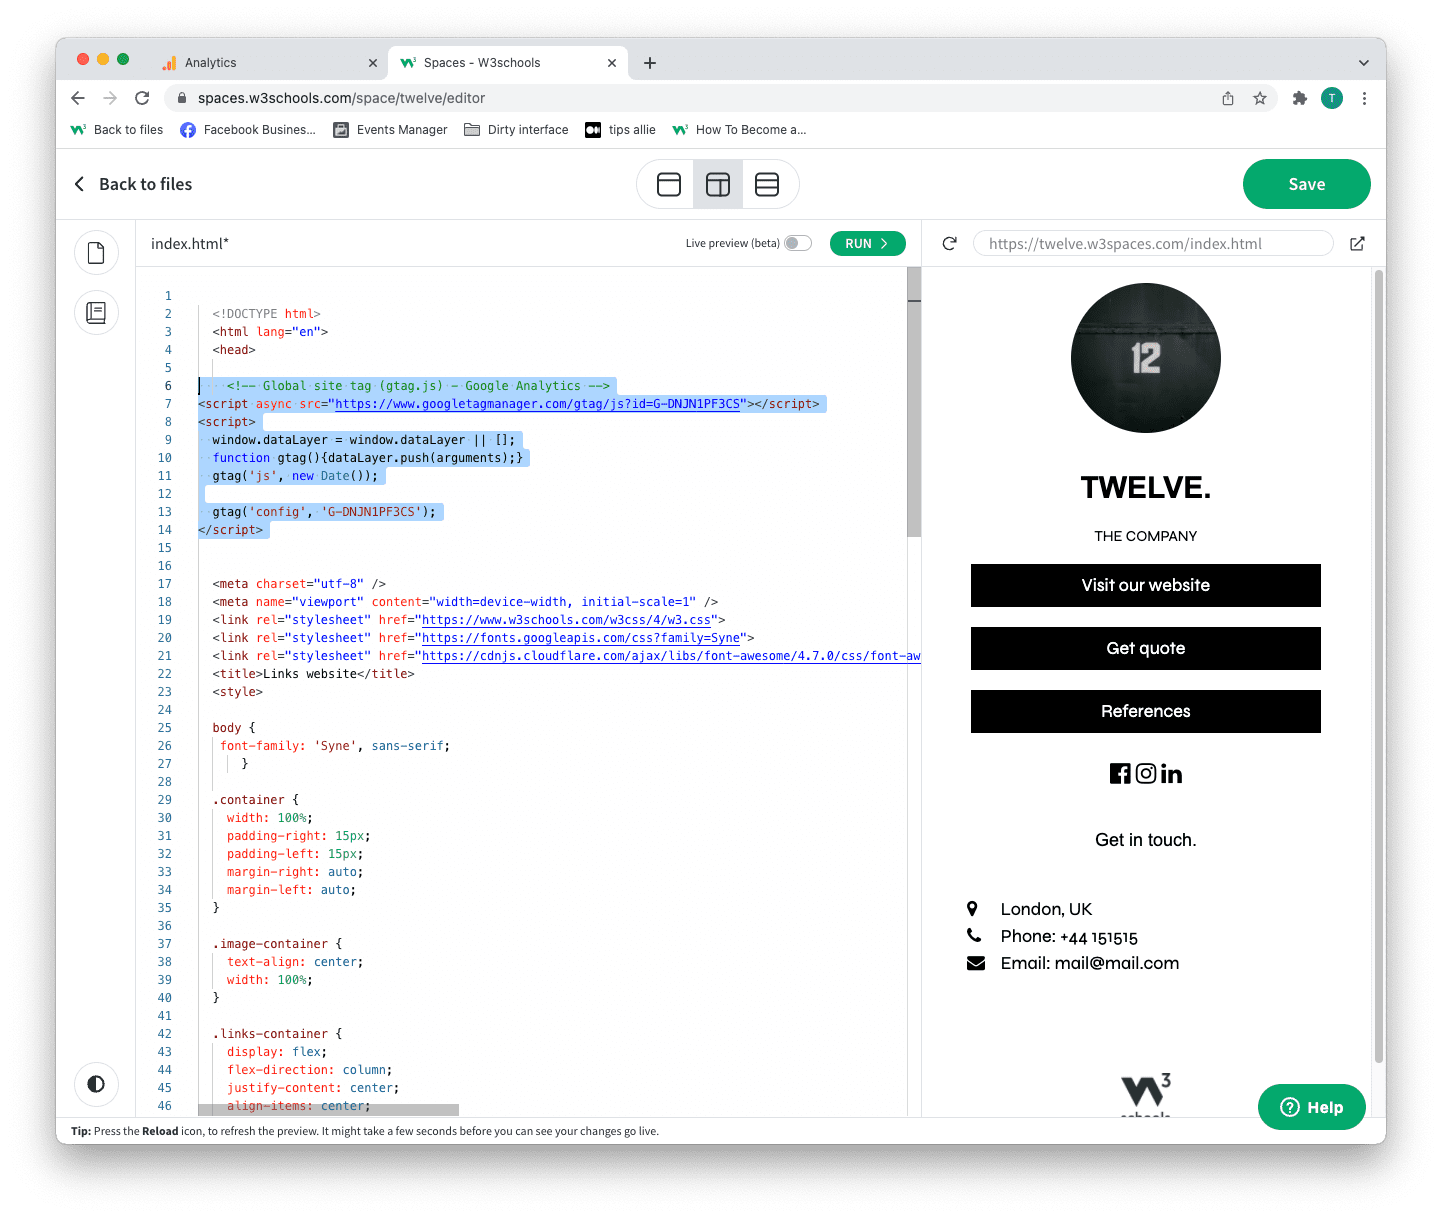
We used W3Schools Spaces in this example.
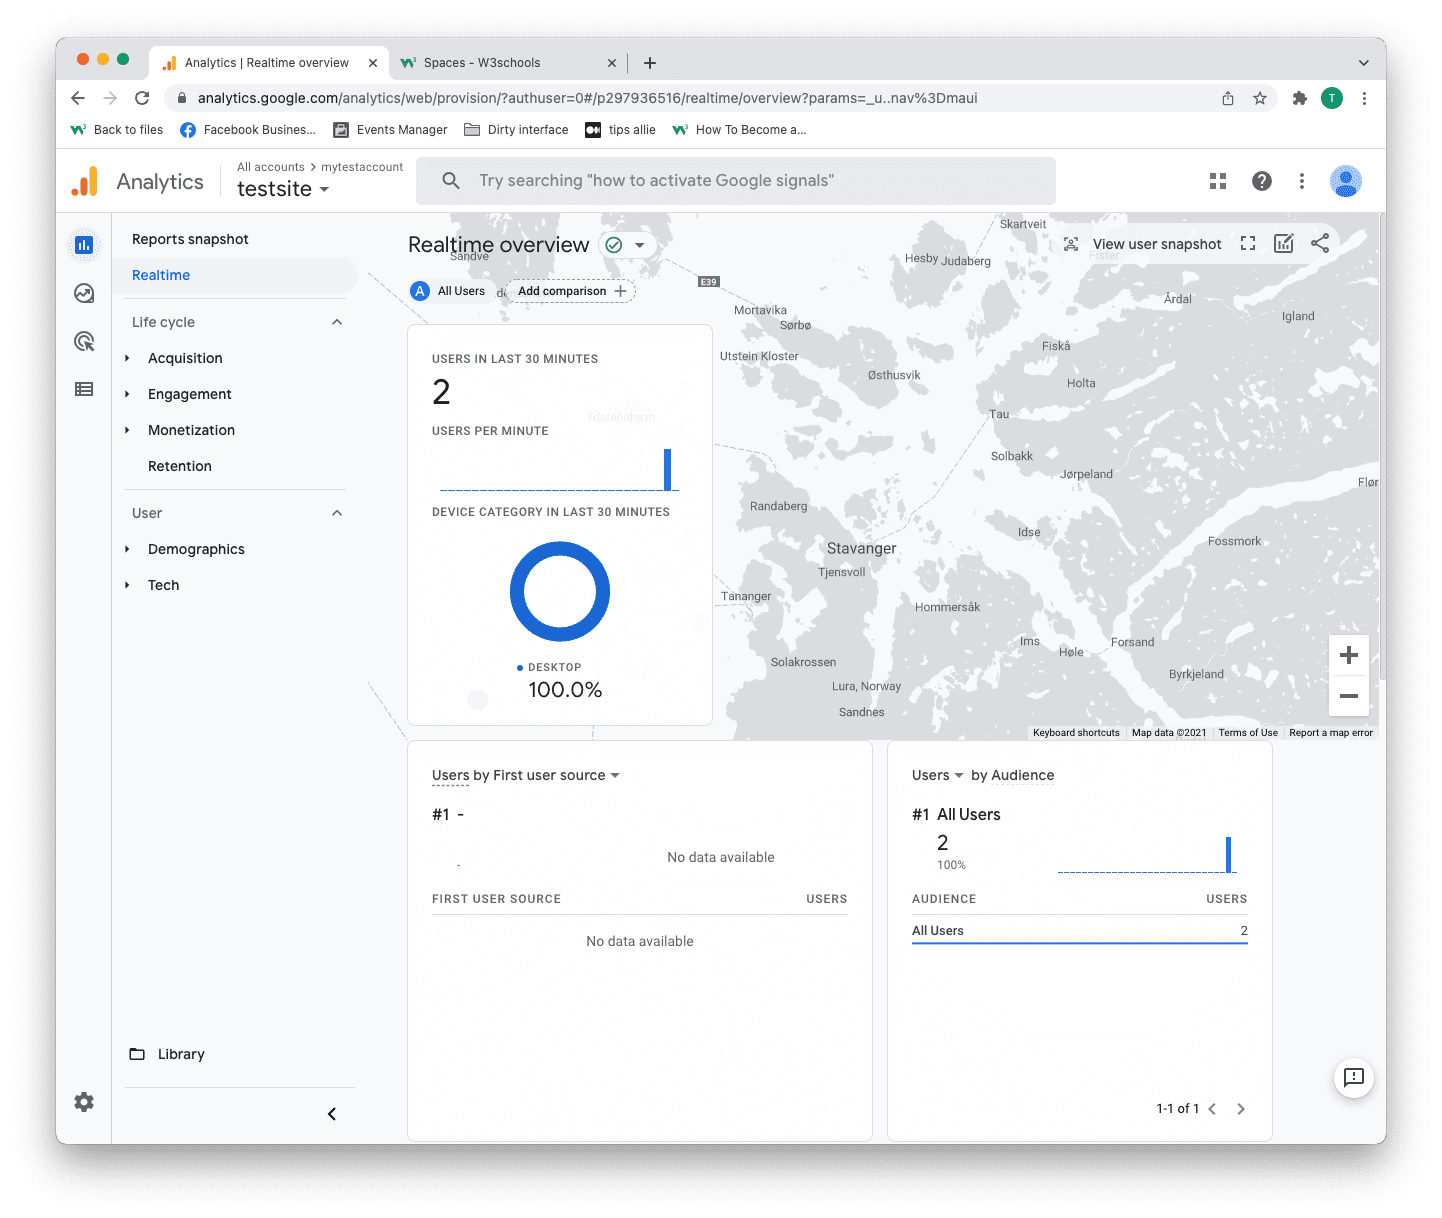
Step 13: Test that it works
Ensure that you have successfully saved and published the code snippet with the correct Measurement ID.
Open the URL for the site you have connected to the data stream.
Click on "Real time" on the menu to the left.
Confirm that you see yourself as an active user.
Congrats. You have successfully enabled Google Analytics for your site!
Explore Google Analytics
Recommended related topics are Tag manager and Events
Spend time in the service to learn about your user activity, commerce, demographics, device, and referrals.
Tip: Ever heard of W3Schools Spaces? It is a personal space where you can make a website from scratch or use a template and host it for free.
It has everything you need in the browser.
Get started in a few clicks.
Start now for free ❯* no credit card required